Accept Easy & Secure Online Payments with Authorize.net and WPForms
When starting an e-commerce business one of the most complex areas is to set up with payment processing services so that you can accept payments online. Once you’ve developed a strategy for accepting payments online, you’ll need to decide which payment processing provider to use. There are hundreds of payment processing companies providing software to help businesses handle online transactions, most of them offer a similar range of services and comparable pricing.
Authorize.net is one recognized name and offer your customers a variety of payment options ranging from debit cards, credit cards and eChecks to digital payments like Apple Pay, PayPal, and Visa Click to Pay. WPForms Recently have launched Authorize.Net addon and now you can use your Authorize.Net account to accept payments using your forms and take advantage of easy to use features to keep sales on your website flowing smoothly and be safe with Authorize.Net’s customizable advanced fraud detection.
In this Tutorial I will show you how to integrate Authorize.Net addon with WPForms, and set up one-time and recurring subscription payments.
1) – How to Install & setup Authorize.Net Addon with WPForms
Assuming that you have already installed and activated your WPForms Elite Pugin (visit; “WPForms Review & Tutorial”) and Authorize.Net merchant account up and running.
a) Installing & Activating Authorize.Net Addon
Head to your Dashboard » WPForms » Addons » Search for “Authorize.Net” and click on “Install Addon” and activate after installation

After installing and activating Authorize.Net Addon go to WPForms » Settings in the left menu of your WordPress dashboard and click on the (1) Payments tab to choose your Currency from (2) dropdown list

After setting up you desired currency, scroll to the section named Authorize.Net. On this screen here you will need to fill out (1) “API Login ID” and (2) “Transection Key” keys that connect your site to your Authorize.Net account.
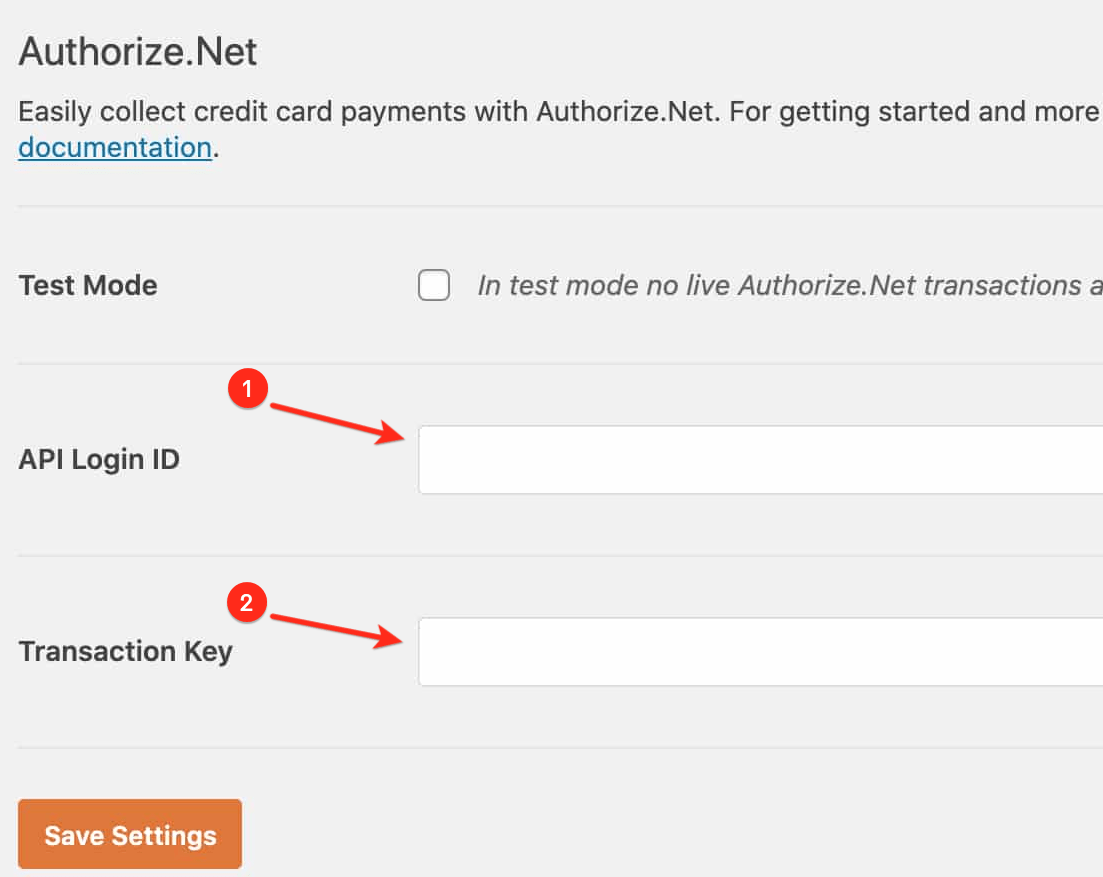
b) Where to get your Authorize.Net keys
Open a new tab or new browser window and sign into your Authorize.Net account, (If you don’t have an account with Authorize.Net yet, you can ). As soon you log into your Authorize.Net account, you will see an overlay screen showing your account status weather is in Test or Live mode, set your option to Live.

After logging in and setting your mode to “Live” now you’ll be able to get API Login ID and Transection Keys by going to the left sidebar under ACCOUNT click on Settings.

Here on the Settings page, under Security settings » click on API Credentials and Keys

Form this page here you will see API Login ID, copy this key, and go back to your WPForms Settings page, and paste this value into the API Login ID field.
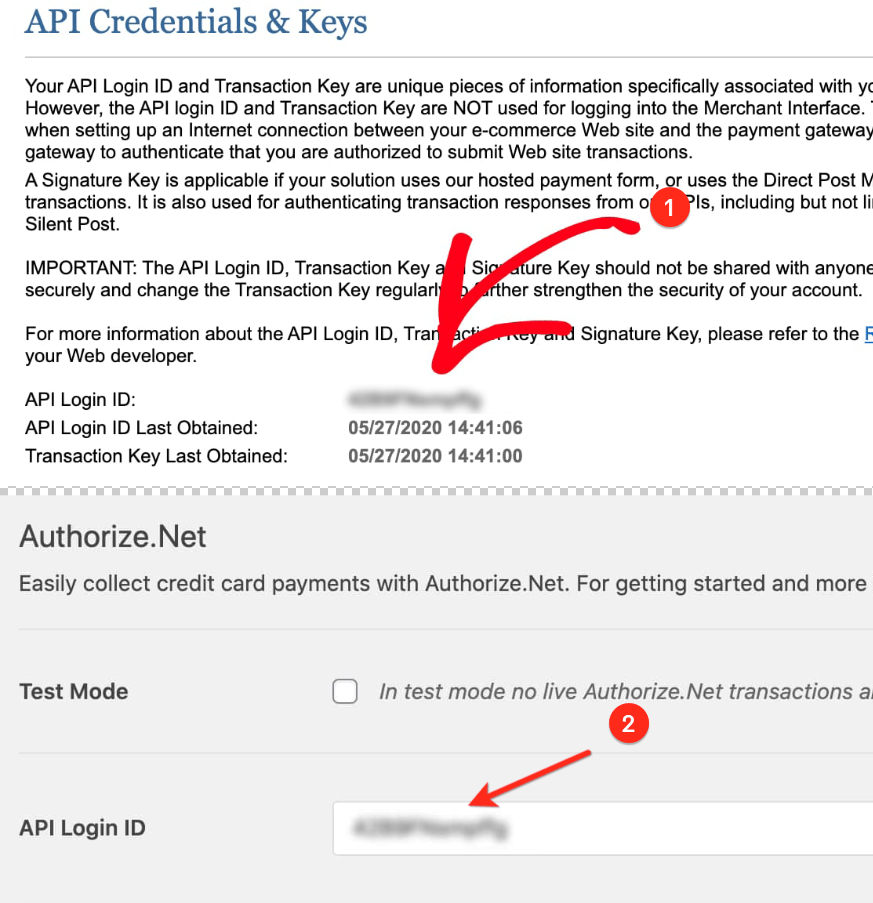
After adding API Login ID, next you need a transaction key, from on the same API Credentials & Keys page, search for the section labeled Create New Key(s), from the (1) Obtain option, select (2) New Transaction Key. and click the (3) Submit button.

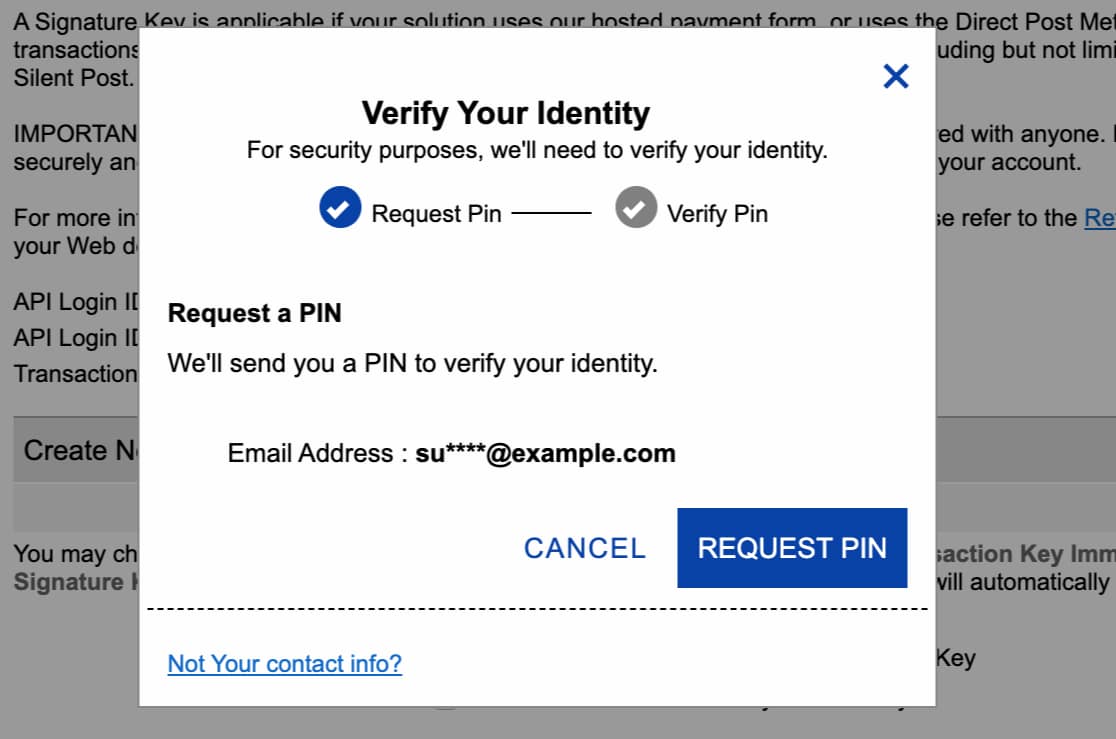
As you clicked on Submit button, a pop-up window should appear asking you to verify your identity. click on the Request PIN button to start this verification process. After submitting the request, check your email and copy the provided PIN and past it in the field here, then click the Verify PIN button.
After your identity verification, Authorize.Net will display your Transaction ID. click on “copy to clipboard”

Next, go back to the browser tab or window with your WPForms Settings and past this key into the (1)Transaction Key field, then click (2)Save Settings, As soon these settings are stored, on the top of the WPForms payment page a message will appear stating “Setting were successfully saved“.

2) – How to add Authorize.Net to Forms
After connecting your Authorize.Net merchant account to your website, now you add payments to your forms. to do so, first, you need to create a new form or edit an existing form. To accept payments with Authorize.Net you need to add at least four basic fields form, which are; A Name field, An Email field, An items field (Single Item, Multiple Items, Checkbox Items, or Dropdown Items), and An Authorize.Net field (which collects credit card details), you can add more fields as per your business model,
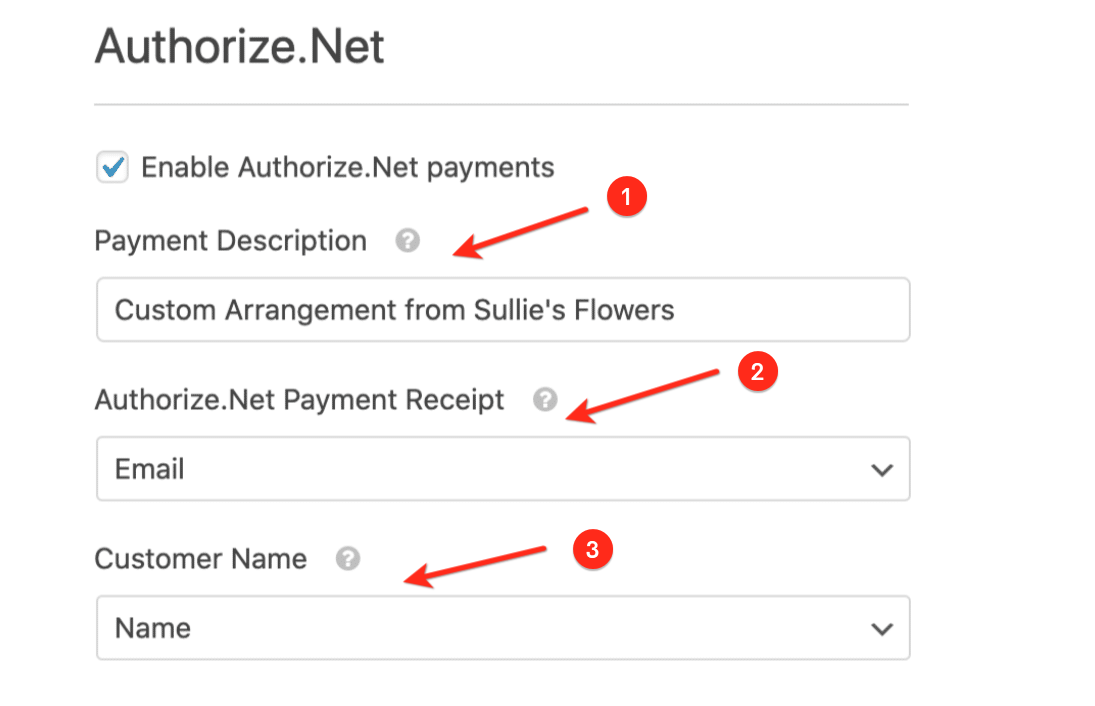
Next in the form builder go to Payments » Authorize.Net. From the Authorize.Net panel, check the box labeled Enable Authorize.Net payments.

on this page you can customize few optional settings like; (1) Payment Description, (2) Authorize.Net Payment Receipt, (3) Customer Name, all of the these information will be sent to Authorize.Net along with the other payment details. Don’t forget to Save Settings.
Congratulations! you have successfully created Authorize.Net one time Payment form. it doesn’t stop here, there is a lot more you can do with this add-on for your website, you can setup recurring subscriptions payments or/and can add advance conditional logic to your payments forms, for more tutorials about WPForms visit my YouTube Chanel Here… Have A Nice Day !!!


