Mailchimp & WPForms – A convenient way to add subscribe form to your Website
Assuming that you have already installed and activated your WPForms Pro Pugin (visit; “WPForms Review & Tutorial”) and ready to install Mailchimp Addon.
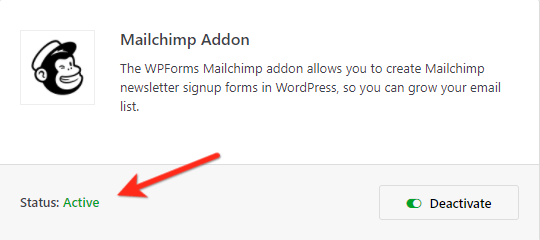
a) Installing & Activating Mailchimp Addon
Head to your Dashboard » WPForms » Addons » Search for “Mailchimp Addon” and click on “Install Addon” and activate after installation
b) Create Newsletter Signup Form
After activating Mailchimp addon, head to WPForms » Add New to create a your first subscribe form and select “News latter Signup form” 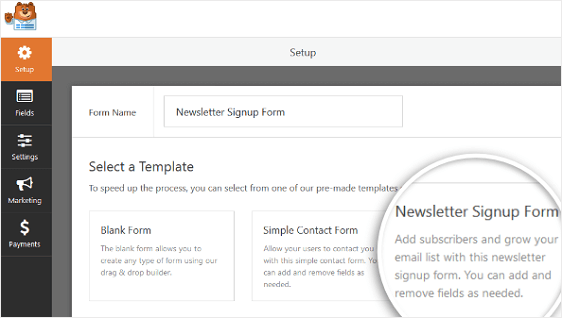
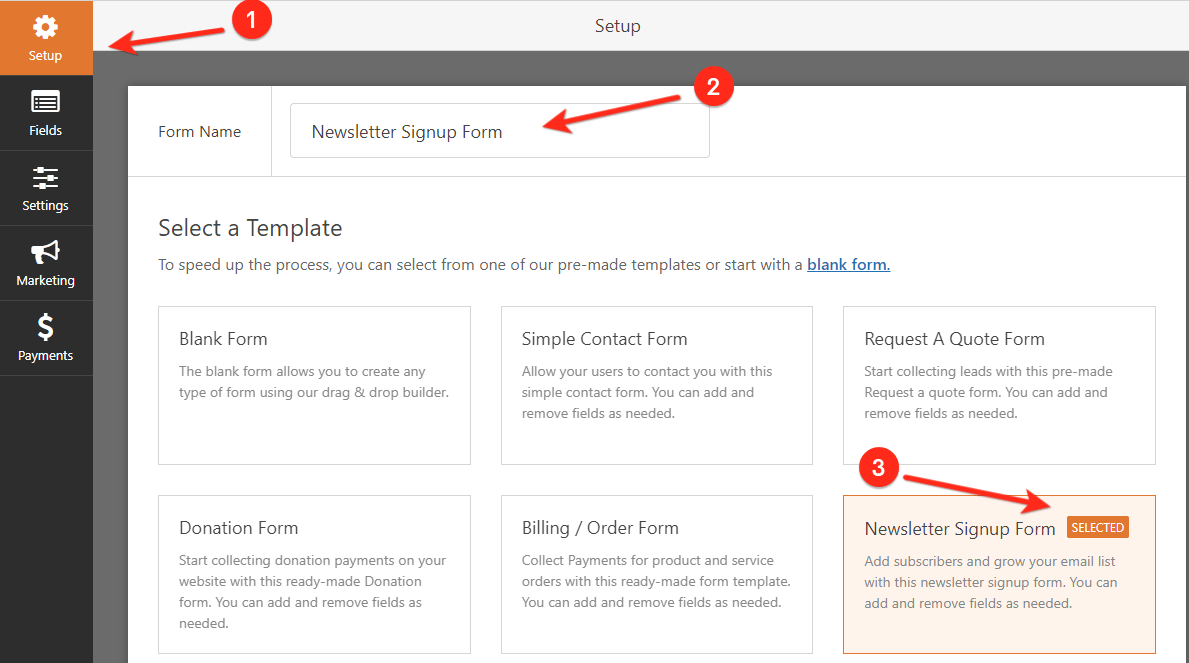
on the next screen click on (1) setup to change the (2) name to more specific for your own reference, (3)You can also see which form you have selected.
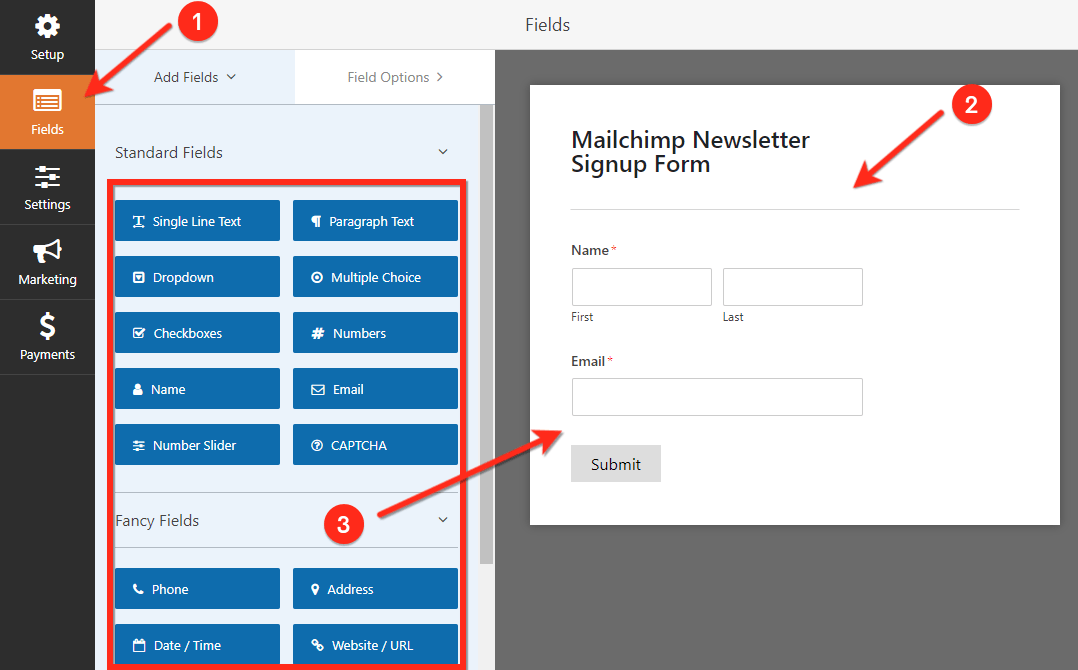
Next, Click on (1) “Fields” from left side menu bar, (2) A premade subscribe form has been create for you and is ready to customize, here you can remove or (3)add additional fields by simply dragging them from the left panel to right in to your form.
click on the fields in form to to make any changes or drag any form field to rearrange the order in your form panel
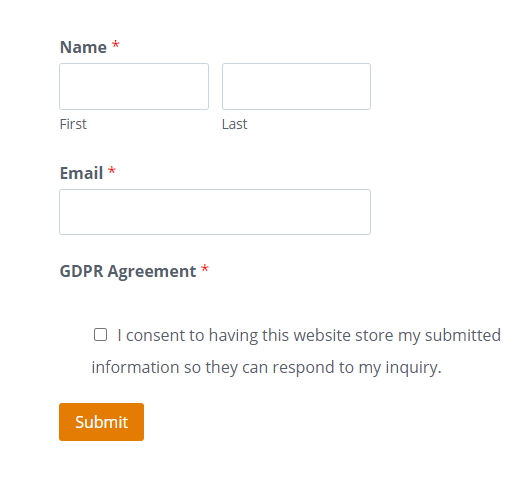
GDPR compliance
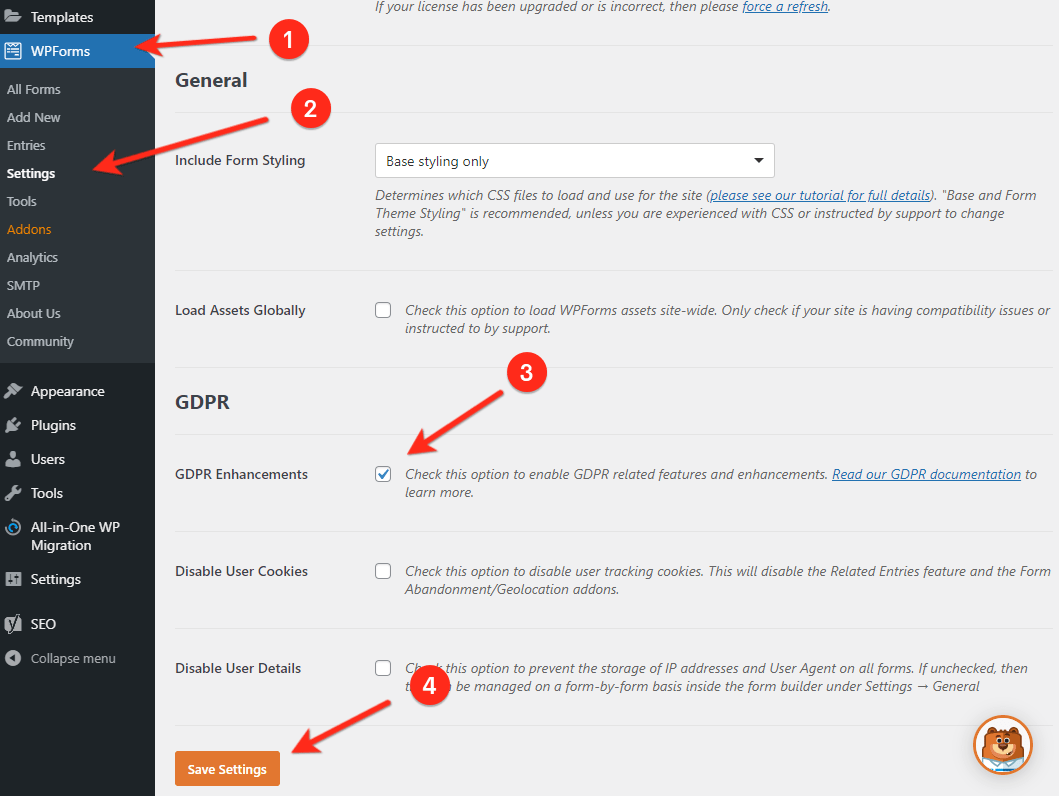
WPforms is a GDPR compliant ready solution, simply drag and add GDPR Agreement field to give your visitors an explicit way to agree for storing their personal information and sending them email marketing materials. To enable GDPR form field, go to (1)WPForms » (2)Settings and click on the (3) GDPR Enhancements checkbox and (4)“Save Settings”.

c) Connect Your Form to Mailchimp
To make connection to your newsletter signup form to Mailchimp service, go to (1) Marketing » (2) Mailchimp. then click (3) Add New Connection.
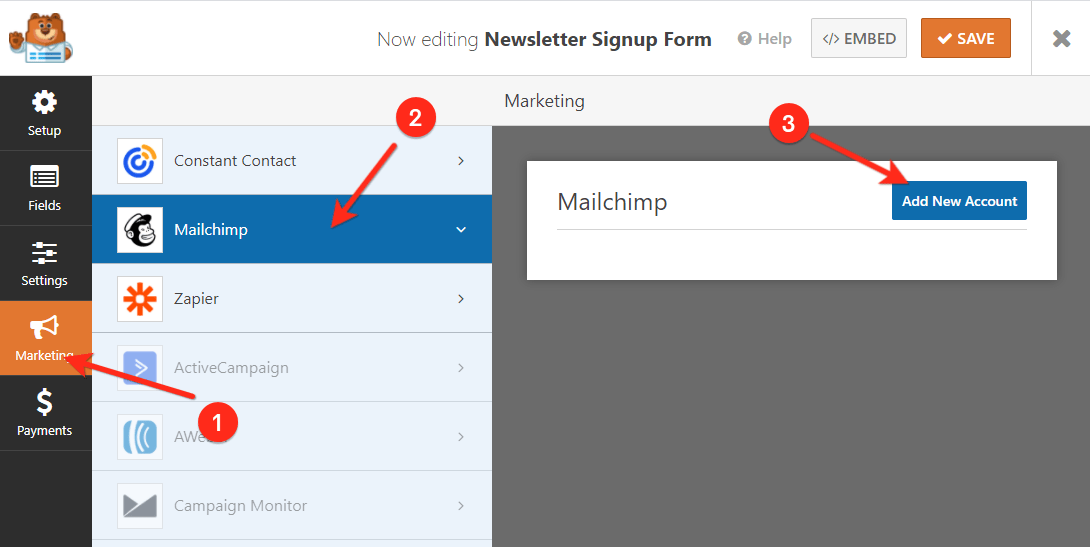
A pop up message will appear and ask you for “MailChimp API Key” and “MailChimp Account Nickname”

d) Get Mailchimp API Key
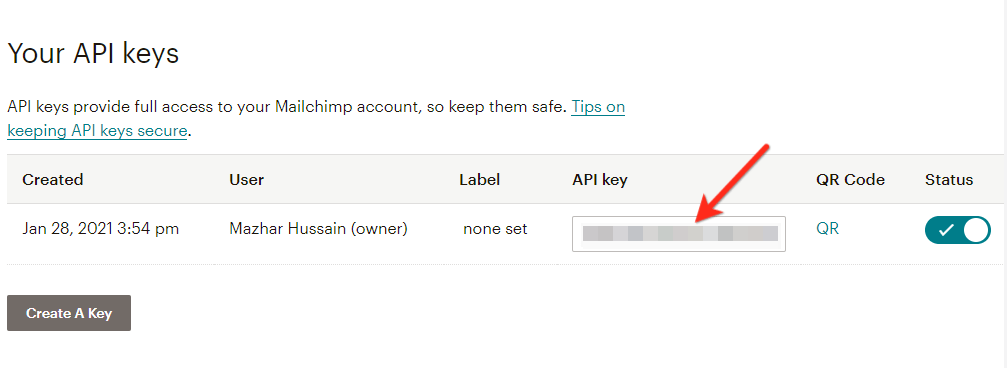
You can get your Mailchimp API Key by signing in to your Mailchimp account and go to Your Profile » Extras » API Keys, copy this key and past it into the box above and click on ADD, give a nickname if prompted again, and continue..
e) Select your Mailchimp account
then choose Mailchimp account from pull down menu, (1) “Sellect Account”, Now more options will appear (2) “Select Audience” from pulldown menu, (3) choose “Action to perform” select your desire action, we selected “Subscribe” (4) Choose suitable option, we selected “Email”

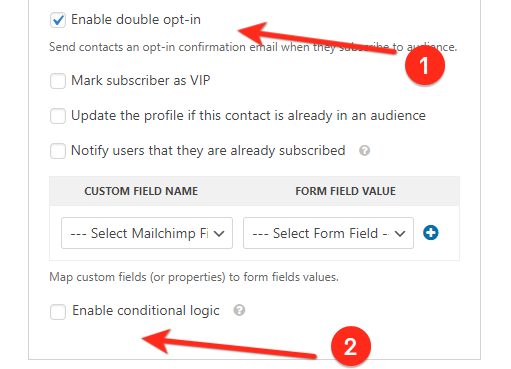
if you wish to enable (1) “Double Opt-in check this box, you can use (2) Enable conditional logic if it applies to your form
f) Configure Form Notifications & Confirmations
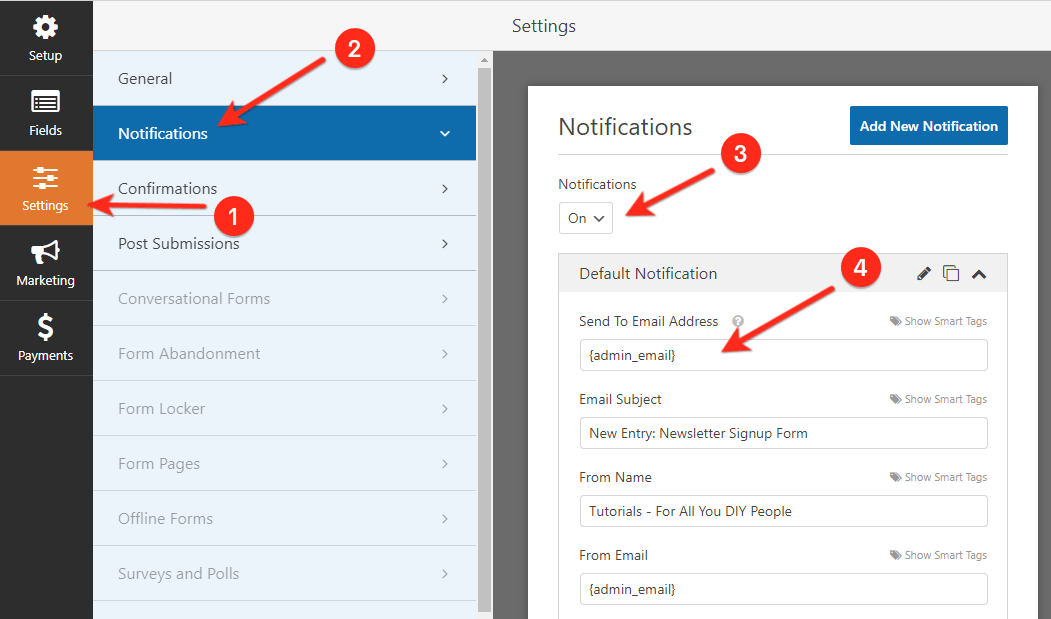
To configure Notifications go to (1) Settings, (2) Notifications. When there is a submission, by default WPForm will sent a notification to admin, you can (3) disable or add other recipients by adding their email to the (4) Send to Email Address field, you can even send a form notification to your site visitor to let them know their form has been received.
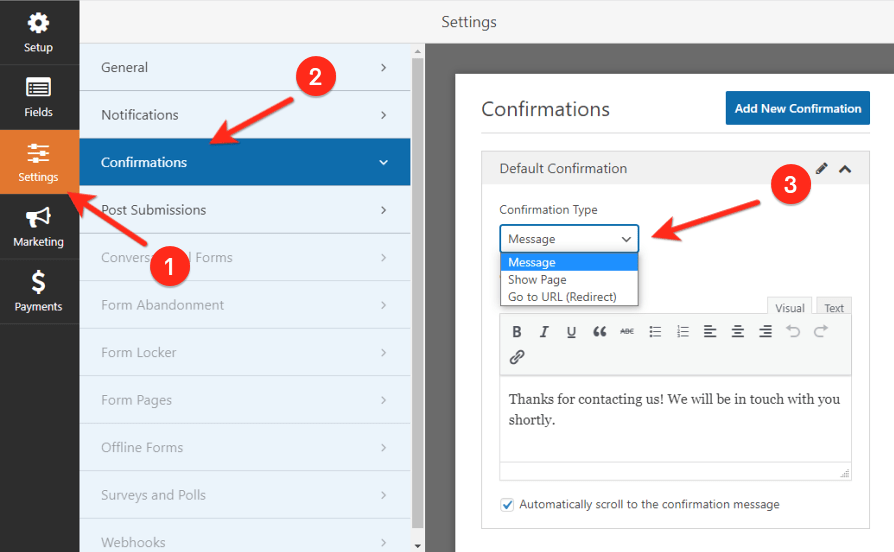
To configure Confirmations go to (1) Settings, (2) Conformations. You can choose one from three types of confirmations, (3) Massage, Show Page, and Go to URL (Redirect)
g) Add Mailchimp Subscribe Form to Your Website
Your MailChimp submission form is ready to be added to your website. with WPForms you can add your forms in several locations like; web pages, blog posts, in sidebar and in footer widgets. Most convent way is to use embed option.

Click on EMBED button & start by creating a new page, give Name to the page in WordPress and then click on the Add Form button, if you have more then one form on your website, Select the form you just created and publish the page so your Mailchimp subscribe form will now appear on website.
Here is your Mailchimp subscribe form ready to collect your visitors for Email Audience list, for more tutorials about WPForms visit my YouTube Chanel Here… Have A Nice Day !!!